Where to Put Paper in HP Printer in 10 Easy Steps
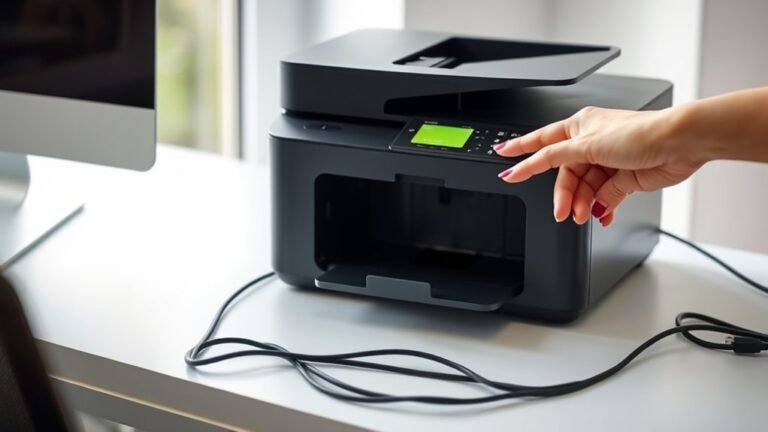
First, determine your HP printer model to see if the paper tray loads from the front or the rear. This step is important because it helps you know exactly where to put paper in your HP printer without any guesswork.
Turn off or pause your printer before opening the tray to avoid any issues. Then, fan and align your paper stack to prevent sheets from sticking together.
Next, slide the paper guides to fit the stack snugly without bending the sheets. Load the paper up to the max line—print side down for front trays and print side up for rear trays.
Make sure to set the right paper size and type on your printer or computer before closing the tray gently. After loading, align the printhead and run a test print to check everything’s perfect.
If you want to avoid jams and get the best print quality, keep exploring for more detailed tips. It’s easier than you think once you know where and how to put paper in your HP printer!
Key Takeaways
- Identify your HP printer model and whether it uses a front-loading or rear-loading paper tray.
- Turn off or pause the printer before opening the paper tray to prevent feeding issues.
- Fan and align paper edges, then load paper up to the tray’s max fill line without mixing sizes.
- Adjust paper guides snugly against the paper edges to prevent skewing or jams.
- Load paper print-side down for front trays and print-side up for rear trays, then close the tray gently.
Find Your HP Printer Model and Tray Type
Where exactly should you put paper in your HP printer? First, check your printer’s model number on the front panel or in the manual. This helps you identify the correct tray location because it varies by model.
Next, determine if your printer is an inkjet, laser, or all-in-one. Inkjet printers usually have a rear-loading tray (print side up) or a bottom/front tray (print side down).
Laser printers often use a front-loading paper drawer, so pull it out and adjust the side and top guides. For all-in-one devices, confirm whether to use the rear or front feed path based on your model.
When you load paper, make sure it’s aligned properly to reduce waste and avoid jams. Taking these steps ensures you load paper efficiently every time.
Choose the Right Paper for Your Print Job
You’ll want to pick the right paper type based on what you’re printing, whether it’s plain documents, photos, or presentations. Make sure the paper size matches your printer settings to avoid jams or misaligned prints.
Also, check that your paper is clean, flat, and properly fanned before loading it into the tray. This little step can save you a lot of hassle later on!
Paper Type Selection
Although choosing the right paper type may appear straightforward, it directly impacts your print quality and ink usage. For everyday documents, choose plain white paper—Letter or A4—and set your printer’s Paper Type to “Plain” to ensure sharp text.
When printing photos, use high-resolution photo paper and switch the setting to “Photo” so the printer adjusts ink density perfectly. For presentations or glossy prints, pick glossy paper and select “Glossy” or “Heavy Glossy” if available.
Always steer clear of curled, damp, or torn paper to prevent jams. Fan the stack before loading to stop multiple pages feeding at once.
Load paper only up to the tray’s max line, and verify the same paper type in your print dialog before printing to get the best results.
Paper Size Considerations
Before loading paper, make certain your HP printer’s supported sizes—commonly Letter (8.5×11 inches) or A4 (210×297 mm)—so your print job matches the tray and settings.
Avoid mixing sizes in one tray and keep paper stacks below the max line to prevent jams. Also, pick the right paper orientation and type in the print dialog for best results.
| Paper Size | Common Use | Orientation Tip |
|---|---|---|
| Letter | Documents | Print side down in front tray |
| A4 | International docs | Print side down or per label |
| Photo | Photos, graphics | Follow printer’s photo tray |
Stick to supported weights to avoid feed errors and maintain print quality.
Paper Condition Tips
Choosing the right paper condition plays an essential role in achieving clear, professional prints with your HP printer. To get the best results, you need to select the paper type that suits your print job and handle it properly.
Use plain white paper for everyday documents. Keep it flat and free from curls, tears, or moisture to avoid jams and poor quality.
Match your paper to the job—photo paper for crisp images and glossy paper for vibrant presentations.
Always check the paper size and load the stack under the tray’s maximum-fill line. Fan and align sheets before loading to prevent multiple feeds.
Store your paper in a dry place. Handle it by the edges to keep prints sharp and smudge-free.
Turn Off or Pause Your HP Printer Before Loading Paper
Before you load paper, make sure to turn off your HP printer or pause the print queue on your computer. This prevents the printer’s feeder parts from moving and causing jams.
Taking this simple step helps you handle the paper trays safely and smoothly. It’s a quick way to avoid any frustrating paper jams or damage.
Power Down Printer
When you’re ready to load paper, make sure you turn off your HP printer or pause the print job on your computer. This step prevents the printer’s moving parts from activating while you handle the paper trays. It helps keep things safe and avoids jams.
Follow these steps to power down properly:
- Use the power button to turn off the printer or pause the print job from your computer’s print queue.
- Wait until the printer fully stops before opening any paper tray, especially with tray-based feeders.
- For older or frequently jamming printers, unplugging completely before loading paper can prevent unexpected movements.
Always confirm the printer is fully powered down or paused before adjusting paper guides or removing old paper. That way, you avoid any damage to your printer.
Pause Print Queue
After powering down your HP printer, the next step is to pause or cancel the print task from your computer’s print queue. Or, you can press the printer’s power or pause button. This stops the printer mechanism and prevents the feeder rollers from moving when you open the tray.
That helps avoid paper misfeeds. If your printer is older and prone to jams, unplugging it after powering down makes it safer to handle the tray and clear any stuck paper.
For a smooth setup, always fully shut down or pause the printer before adjusting paper guides or removing debris-filled sheets. Once you’ve loaded the paper and set the guides, restart the printer and send the print task again.
It’s a good idea to use a test print if needed to make sure everything runs smoothly.
Open the Paper Tray for Your Printer Type
Although HP Smart Tank and all-in-one printers differ in design, you’ll need to identify whether your model uses a rear or front paper tray. This is essential before loading paper.
Here’s how to open it:
- For a front-loading tray, pull it out from the bottom front of the printer and spread the side or top guides outward.
- For a rear-loading tray, flip open the rear feed at the back and extend any rear support arm if available.
Make sure the tray is fully open before loading paper to avoid jams or misfeeds.
Once open, you’re ready to adjust the guides and place your paper correctly. Knowing your tray type ensures smooth paper feeding and hassle-free printing.
Adjust Paper Guides to Fit the Paper Size
Before loading paper, slide the side guides outward so they don’t press the stack. Then, position the paper edges and slide the guides back until they fit snugly.
This makes sure your paper feeds straight without jams or wrinkles. It’s a simple step that can save you a lot of hassle later on.
Slide Guides Outward
When you pull the slide-out paper side guides outward, make sure they’re wider than your paper’s width before loading any sheets. This first step helps the paper feed smoothly and keeps jams at bay.
Here’s how to adjust the guides properly:
- If your tray has a top or front guide, slide it outward to match the paper size, like Letter or A4, so the stack lies flat.
- Place the paper in the tray, pushing it gently against the rear stop or edge.
- Slide the side guides inward until they just touch the paper edges without squeezing them. Don’t press too hard—tight guides can warp or jam the paper.
Position Paper Edges
After sliding the paper guides outward to fit your paper’s width, you’ll want to adjust them so they lightly touch the edges of the paper stack without bending or warping it. Make sure the guides match the precise paper size marked on the tray, like Letter or A4.
Place the paper straight, aligning its edges with the guide rails, then tap the stack gently to square the corners before closing the cover. Once loaded, double-check both the side and, if present, top guides to ensure there’s no additional space that could let sheets shift and cause misfeeds.
Remember to load paper only up to the maximum fill line. This helps avoid pushing the guides out of alignment and causing crooked feeding.
Secure Guides Snugly
To ensure you’ll want to slide the paper guides snugly against the edges of your stack to keep the sheets aligned without bending them. Start by sliding the side guides outward so they don’t rub the paper edges.
Then, load your paper stack up to the tray’s maximum line and tap it to square the edges. Finally, adjust the guides inward until they lightly touch the paper—snug but not tight—to prevent skewing during feeding.
Don’t forget to set the top or height guide so the paper lies flat without bowing. After closing the tray, double-check the guides to ensure the paper isn’t shifting, as this can cause misfeeds or misaligned prints.
Follow these steps for smooth, accurate printing every time:
- Slide side guides outward before loading paper.
- Tap and square the paper stack.
- Adjust guides snugly to touch paper edges.
Load Paper With Correct Orientation and Alignment
To load paper correctly, first identify whether your HP Smart Tank tray is front- or rear-loading and place the paper accordingly—print-side down for front-loading trays and print-side up for rear-loading trays.
Before you start, pause or turn off the printer to prevent the feeder from moving as you handle the paper. Pull out the tray, clear any old paper or debris, and tap the stack’s edges to align the sheets flat. Make sure you don’t exceed the maximum fill line.
Place the paper in the tray with the correct orientation, then close the tray or cover gently. Finally, select the proper paper size and type in your printer’s settings, and run a test print to confirm the paper is aligned and feeding correctly.
Fine-Tune Paper Guides to Secure the Paper
Once the paper is loaded with the correct orientation and alignment, focus on adjusting the paper guides to keep the stack secure. Properly fine-tuned guides prevent paper jams and misfeeds, ensuring smooth printing.
Adjusting paper guides properly keeps your stack secure and prevents jams for smooth, hassle-free printing.
Follow these steps:
- Gently slide the side guides inward until they just touch the edges of the paper without bending or warping the stack.
- If your tray includes a top guide, adjust it so it lightly contacts the paper surface, preventing skewing during feeding.
- Confirm the paper doesn’t exceed the “max” fill line on the tray, then tap the edges gently to keep the stack flat and aligned.
After adjusting the guides, run a quick test print to verify the paper feeds straight and the printer operates without issues. It’s a simple step that can save you a lot of hassle later on.
Set Paper Size and Type on Your HP Printer or Computer
| Setting | On Printer Control Panel | On Computer (Windows/Mac) |
|---|---|---|
| Paper Size | Setup → Paper Setup | Printer Properties → Paper/Quality |
| Paper Type | Setup → Paper Setup | Printer Properties → Paper/Quality |
| Verification | Print Test Page | Print Test Page |
Align the Printhead After Loading Paper
After loading paper into the correct tray, make sure the paper guides lightly touch the stack so your printer feeds the pages straight.
Ensure paper guides gently touch the stack for smooth, straight feeding every time.
Next, align the printhead to ensure great print quality. Here’s how:
- On your HP Smart Tank, open the control panel and navigate to the Setup or Tools menu, then select “Align Printhead.”
- Confirm the loaded paper is flat, without curls or damage, and fully close the tray or cover before starting the alignment.
- Allow the printer to print the alignment page without interruption. Check that the printed lines appear clear and properly aligned.
If the alignment looks off, just repeat the process until you get a crisp, accurate printout. This step really helps keep your text sharp and images vibrant.
Run a Test Print and Troubleshoot Issues
How can you be confident your printer is set up correctly? After loading paper, run a Test Print from the printer control panel or Printer Properties on your computer. This confirms the paper size and type settings are accurate.
If the test page is misaligned or fails, re-check the paper guides—they should lightly touch the paper edges without squeezing. Also, make sure the paper is loaded up to the “maximum” line.
Verify the correct orientation: rear loading usually means print side up, front loading print side down. If prints are blank or inconsistent, use the printer’s Printhead Alignment option and try again.
Remove any curled, damp, or torn paper and clear debris. Then, run another test print to confirm smooth feeding and proper setup. Easy, right? Just a little troubleshooting goes a long way!
Frequently Asked Questions
Where to Place Paper in HP Printer?
You place paper in the rear tray of your HP printer with the print side facing up, or in the front/bottom tray with the print side facing down.
Adjust the guides snugly and check settings before printing to avoid jams.
It’s a simple step, but it really helps keep everything running smoothly. Just double-check before you hit print!
How to Properly Place Paper in a Printer?
You’d think placing paper in a printer is rocket science, but it’s simple! Fan the sheets first to prevent them from sticking together.
Load the paper print-side down or up depending on your printer’s tray. Make sure to align the edges properly.
Slide the paper guides snugly against the paper to keep it in place. Don’t forget to choose the right paper settings before you hit print.
Where Should I Put Paper in My HP Deskjet 4258E Printer?
You should put paper in the input tray located at the front bottom of your HP DeskJet 4258e.
Load plain paper print side down, and make sure to align the edges properly. Don’t overfill the tray, okay?
Also, adjust the guides snugly to avoid any jams. This helps keep everything running smoothly.
Where Should I Put Paper in My HP Deskjet 4100 Printer?
Think of your HP Deskjet 4100’s input tray as a treasure chest—slide it out from the bottom front. Place the paper print-side down, then gently guide the edges.
Don’t overload it; keep it neat for smooth printing adventures. It makes everything run much smoother, trust me!
Conclusion
Now that you know exactly where to put paper in your HP printer, you’re set for smooth printing every time.
Imagine Sarah, who struggled with paper jams until she adjusted her tray guides and set the paper size correctly. After following these steps, her prints came out crisp and jam-free.
Just like Sarah, you can avoid frustration and keep your printer running perfectly by taking these simple steps before you print. Knowing where to put paper in HP printer trays and how to adjust the guides correctly makes all the difference.
By placing the paper properly and selecting the right paper size, you’ll enjoy hassle-free printing and save time. So go ahead, load your paper with confidence, and watch your HP printer deliver flawless results every time!