How to Make a Printer Wireless in 7 Easy Steps
First, confirm if your printer supports wireless printing by consulting the manual or checking the settings. This step is crucial to ensure your device can connect without cables.
Place your printer close to the router to ensure a strong Wi-Fi signal, which helps avoid connection issues.
Next, use the printer’s setup menu to connect to your Wi-Fi network.
Enter the password carefully to make sure the connection is successful.
After that, install the correct wireless drivers on your device.
Then, add the printer in your device’s settings to complete the setup.
Print a test page to verify the connection is working properly.
If anything goes wrong, update the drivers or troubleshoot the issue as needed.
Keep going for tips on optimizing your wireless printer and resolving common problems.
Key Takeaways
- Confirm your printer model supports wireless printing and install the latest drivers from the manufacturer’s website.
- Place the printer close to the router to ensure a strong and stable Wi-Fi signal.
- Use the printer’s setup menu to select your Wi-Fi network and enter the exact password to connect.
- Install the printer drivers on your computer or mobile device and connect both devices to the same Wi-Fi network.
- Print a test page and verify the printer status is online, troubleshooting any connection issues as needed.
Check If Your Printer Supports Wireless Printing
Start by confirming whether your printer supports wireless printing. Look up your exact model number in the manual or on the manufacturer’s website to make sure it offers Wi‑Fi capabilities.
Check your printer for a wireless icon, button, or a “Wireless/Network” option in the settings menu. Some models need an external Wi‑Fi adapter, so verify if that applies to yours before proceeding.
Also, review the product specs to confirm supported connection types like Wi‑Fi Direct, AirPrint, or a dedicated printer app. If you run into issues or need clarification, don’t hesitate to contact customer service.
Finally, ensure you have the latest printer drivers installed to enable smooth wireless functionality. Following these steps will set a solid foundation for your wireless setup.
Place Your Printer Close to the Router for a Strong Signal
Although wireless printers offer convenience, placing your printer close to your router is essential for maintaining a strong and stable Wi-Fi connection. Position your printer in the same room as your router or as near as possible to maximize signal strength and reduce connection drops.
Avoid placing it near thick walls, metal surfaces, microwaves, or large appliances. These can weaken both 2.4 GHz and 5 GHz signals.
If your router supports dual bands, try the faster 5 GHz when you’re close by. Then switch to 2.4 GHz for longer distances.
Aim for a “Good” or “Strong” Wi-Fi signal on your printer’s display. This helps prevent slow printing or “printer offline” errors.
After relocating, rerun the wireless setup or print a test page to confirm a stable connection before settling on its final spot.
Connect Your Printer to the Wireless Network Using Its Setup Menu
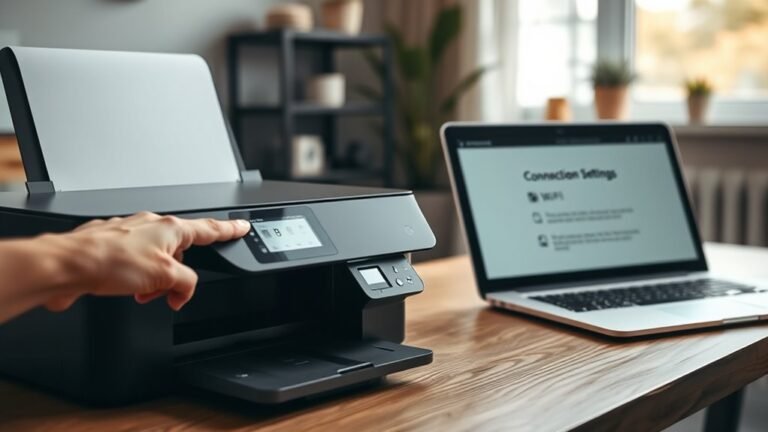
Connecting your printer to your wireless network is straightforward using its built-in setup menu. Start by opening the printer’s Setup, Wireless, or Network menu, then select the Wireless (Wi-Fi) Setup Wizard.
Easily connect your printer to Wi-Fi using its built-in setup menu and the Wireless Setup Wizard.
Your printer will scan for available Wi-Fi networks—choose your SSID (network name) from the list. Enter your Wi-Fi password exactly as it appears on your router, since it’s often case-sensitive.
After entering the password, wait for a “Connected” or “Success” message, or a network status page to confirm the connection. If your printer can’t find the network, try using WPS by pressing the router’s WPS button or entering a PIN from the printer’s setup menu.
Finally, check the printer’s IP address on the Network Settings page to confirm it’s connected. It’s a good way to make sure everything’s working fine.
Install Wireless Printer Drivers on Your Computer or Mobile Device
You’ll usually need to install wireless printer drivers on your computer or mobile device to ensure dependable communication with your printer. First, verify your printer’s model supports wireless printing, then download the correct drivers from the manufacturer’s website or use the included CD.
Make sure your device connects to the same Wi-Fi network as the printer, since most setup wizards require this. Run the setup wizard, select your printer from the list, and follow the prompts to complete installation.
On mobile, add the printer through the iOS/Android printer menu or the brand’s app to recognize the driver. If your printer appears “offline,” restart Wi-Fi on both devices and reinstall the drivers to fix common network or driver issues.
Add Your Wireless Printer in Device Settings
Once your printer is connected to the same Wi-Fi network as your device, head into your device’s settings to add the printer. On Windows, go to Settings → Printers & scanners, or on other devices, open Settings → Bluetooth & devices → Printers & scanners.
Tap or click Add device to search for your wireless printer. If it doesn’t appear, choose Add manually and enter the printer’s IP address found in the printer’s network settings.
Make sure you’ve installed the latest drivers or software from the manufacturer’s website if prompted, as this ensures your printer functions properly. After adding the printer, it’ll be ready to receive print jobs and work wirelessly with your device.
Print a Test Page to Confirm the Wireless Connection
Once you’ve connected your printer to Wi-Fi, print a test page from its control panel or device settings to confirm the wireless link.
Make sure you’re using the correct printer driver on the same device connected to your network.
Check the test page for network details to verify the printer is online and properly connected.
Test Page Printing Steps
Before printing a test page, make sure your printer is connected to your Wi-Fi network by checking the Network or Wireless Setup in its control panel.
Next, from your computer or smartphone, open Printers & Scanners (Windows) or Printers & Devices (macOS). Select your wireless printer and click Print a Test Page.
Ensure the printer status reads Online or Ready, and no “Printer Offline” or connection errors appear. If the test page doesn’t print, verify both your printer and device are on the same wireless network (same SSID) and restart them.
Once the test page prints successfully, examine it for alignment, text clarity, and color or black consistency. This confirms your wireless connection is working smoothly and your printer is ready for use.
Confirm Wireless Connectivity
How can you be confident your printer is truly connected to your Wi-Fi network? First, check that the printer’s wireless indicator light is solid, not blinking, and matches your phone or laptop’s Wi-Fi network.
Next, print a wireless test page from the printer’s control panel—look for options like “Wireless Test” or “Print Network Configuration.” On this page, verify the Wi-Fi SSID matches your router’s name and that an IP address is listed; this confirms the printer’s presence on the network.
If it shows “offline” or lacks an IP, restart both the printer and router, then rerun the wireless setup wizard. Finally, print a short document from your device to ensure everything works end to end.
Update Wireless Printer Drivers and Troubleshoot Common Wireless Printing Issues
If your wireless printer keeps showing as offline or struggles to connect, you should first make sure it’s connected to the same Wi-Fi network as your device—not a guest or blocked network. Next, update your printer driver from the manufacturer’s website to fix most connection issues.
If printing still fails, reinstall drivers using the setup wizard, selecting the correct Wi-Fi connection method like WPS. For slow printing, check your printer’s Wi-Fi signal and try switching router bands (2.4 GHz or 5 GHz). Also, make sure your router firmware is up to date.
Low-quality prints after updates can often be fixed by verifying print settings and running the printer’s alignment or cleaning tools. Finally, clear the print queue, restart devices, and test from another device to pinpoint issues.
Frequently Asked Questions
How to Make an Old Printer Wireless?
You can make your old printer wireless by connecting a Wi-Fi print server or an Ethernet-to-Wi-Fi adapter. This lets you link the printer to your network without any cables.
Next, install the necessary drivers on your computer. After that, add the printer using its IP address or through the device wizard.
This setup makes wireless printing easy and convenient, even with an older printer. Just follow these steps, and you’re good to go!
How to Set up a Printer on Windows 7?
To get the ball rolling, open Control Panel. Then, go to Devices and Printers, and click Add a printer.
Choose your network printer, and install drivers from the manufacturer’s site. After that, print a test page to ensure everything’s configured.
It’s a pretty straightforward process, and you’ll be up and running in no time!
Why Won’t My Printer Connect to My Wifi Network?
Your printer won’t connect because of password errors, incompatible Wi‑Fi frequency bands, or network restrictions. Double-check your password, make sure both devices are on the same network, and restart your router and printer to fix common connection glitches.
Sometimes, it’s just a simple mix-up with the password or your printer might be trying to connect to the wrong Wi-Fi band. Just give everything a quick restart and see if that helps. It usually does!
What Is the Easiest Wireless Printer to Set Up?
The easiest wireless printer to set up is one with a guided Wi-Fi setup wizard, WPS or QR-code pairing, and strong app support.
Look for models from HP, Canon, or Epson for smooth, quick connections and hassle-free use. It really makes getting started a breeze!
Conclusion
Now that you’ve set up your wireless printer, you’ll enjoy the convenience of printing from anywhere in your home or office. Did you know that 65% of households with printers now use wireless connections? This shift shows how essential wireless printing has become for seamless productivity.
By following these simple steps, you’re not just saving time—you’re joining millions who’ve embraced hassle-free, cable-free printing. It really makes a difference when you can print without being tied down by cords or limited to one spot.
Just remember to keep your drivers updated to maintain smooth performance. Staying current with updates ensures your wireless printer works efficiently and without interruptions. Wireless printing is all about making your life easier and more flexible, so enjoy the freedom it brings!