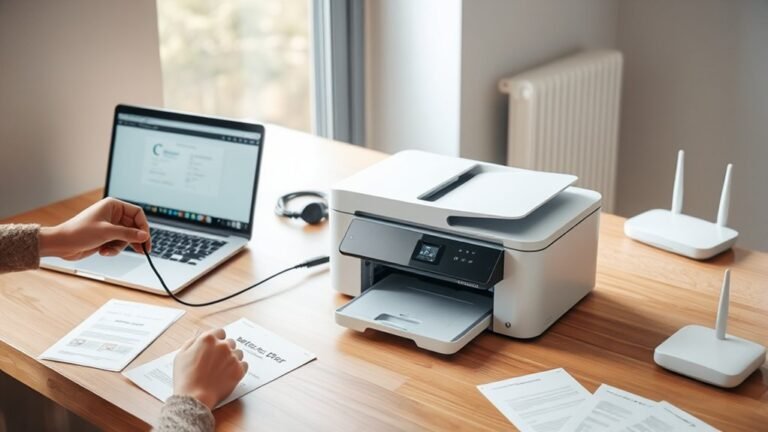
What Is the Drum on a Brother Printer and How Do You Replace It?
The drum on your Brother printer is a crucial component that transfers toner onto paper to create your prints.
It plays a big role in ensuring your documents and photos come out clear and sharp.
Over time, though, the drum wears out, which can cause your prints to look dull or have streaks.
That’s why replacing the drum is key to restoring that crisp, high-quality print you expect from your Brother printer.
To replace the drum, start by turning on your printer and opening the front cover.
Next, remove the combined toner and drum assembly carefully.
After that, separate the toner cartridge from the old drum.
Then, insert the toner into the new drum before putting everything back in place.
Doing this properly helps keep your print quality consistent.
Plus, there’s a bit more to know about smooth maintenance and resetting the drum counter to keep things running perfectly.
Key Takeaways
- The drum unit, or OPC drum, transfers toner images onto paper in Brother laser printers. It’s a crucial part of making sure your prints come out clear and sharp.
- Brother printers use separate drum and toner units, which means you have to replace the drum separately to keep your print quality top-notch.
- To replace the drum, first power on your printer. Then, open the front cover and take out the combined drum and toner assembly.
- Next, push the green lock lever to release the drum. After that, you can separate the toner cartridge from the old drum unit.
- Now, insert the toner cartridge into the new drum until you hear it click into place. Finally, reinstall the assembly, close the cover, and don’t forget to reset the drum counter.
Understanding the Drum Unit on a Brother Printer
If you’ve ever wondered what the drum unit does in your Brother laser printer, it’s the part that transfers the charged image from the toner onto your paper. This component, often called the OPC drum, plays a vital role in printing.
Brother printers typically use separate consumables, so you replace the drum unit without swapping out the toner cartridge. When it’s time to replace the drum, you’ll remove the toner cartridge from the old drum unit and install it into the new one.
Make sure you hear a clear “click” to confirm the toner cartridge is securely in place. After installing the new drum unit, don’t forget to reset your printer’s OPC drum counter following your specific Brother model’s instructions.
Why Replacing Your Drum Improves Print Quality
Knowing the drum unit’s role in transferring toner to paper helps clarify why replacing it can substantially boost your print quality. A worn drum causes dull prints, streaks, and bands, while a new drum restores sharp text and consistent shading.
Since Brother printers separate drum and toner, changing just the drum improves quality without swapping toner. A fresh drum also reduces vertical lines and spots by providing a clean surface for each page.
After replacement, resetting the drum counter ensures accurate tracking for ongoing quality.
| Issue | Cause | Improvement After Replacement |
|---|---|---|
| Light or dull prints | Worn drum surface | Restored toner transfer |
| Streaks | Drum damage | Clear, streak-free output |
| Repeating bands | Drum wear | Even shading and sharp text |
| Vertical lines | Contaminated drum | Reduced artifacts |
| Faded images | Overused drum unit | Crisp, consistent prints |
Preparing Your Brother Printer for Drum Replacement
Start by switching on your Brother printer to make sure it’s ready for maintenance.
Next, open the front cover to access the drum and toner area. This allows you to start the process of removing the components needed for drum replacement.
Powering On Printer
Before ensuring the drum on your Brother printer, you’ll need to power it on and open the front cover to access the toner cartridge and drum unit assembly. Make sure your printer is fully powered and ready for service before you handle any internal components.
Confirm that your Brother model uses separate consumables—both a toner cartridge and a drum unit—so you only replace the drum without discarding the toner. Next, remove the toner cartridge and drum unit assembly together to prepare for the drum replacement.
Inside the assembly area, locate the green lock lever; you’ll need to push it down during the drum replacement process. Powering on and opening the printer properly ensures safe and smooth access to these parts.
Opening Front Cover
Once your Brother printer is powered on and you’ve located the toner cartridge and drum unit assembly, the next step is to open the front cover. Gently lift the cover to reveal the interior where the toner and drum unit sit together.
Opening this cover gives you direct access to these components, allowing you to remove the assembly as one piece. Remember, Brother printers use separate consumables, so you typically replace only the drum unit, not both parts.
After pulling out the toner cartridge and drum unit assembly, carefully detach the toner cartridge from the drum unit. This step prepares your printer for the drum replacement process, ensuring you handle each component correctly without damaging the printer’s internal parts.
Removing the Old Drum Unit and Toner Cartridge on a Brother Printer
Power on your Brother printer and open the front cover to access the drum unit and toner cartridge assembly. Turn on the machine and open the front cover to reach the drum unit and toner cartridge assembly.
Remove both components together before separating them. Push the green lock lever down to release the old drum unit. Next, carefully take the toner cartridge out of the drum unit, since the toner is removed during the drum replacement process.
Make sure you fully remove the old drum unit and toner cartridge and set them aside before installing the new drum unit.
| Step | Action |
|---|---|
| 1 | Power on and open front cover |
| 2 | Remove drum unit and toner cartridge assembly together |
| 3 | Push green lock, separate toner cartridge from drum unit |
Installing the New Drum Unit With Your Existing Toner
Start by inserting your existing toner cartridge into the new drum unit until you hear a clear click. This sound confirms it’s fully positioned.
That click means the toner is securely held within the drum. Once you’ve heard it, you’re good to go.
Now, you can reinstall the combined unit back into your printer. Easy as that!
Inserting Toner Cartridge
Before installing the new drum unit, you’ll need to transfer your existing toner cartridge into it. First, carefully remove the toner cartridge from the old drum unit.
Then, insert it into the new drum unit, pushing firmly until you hear a satisfying click. This sound confirms the toner is locked securely in place.
Make sure the toner cartridge is aligned properly and fully seated before moving on. Only after confirming this should you reinstall the combined drum and toner assembly back into your Brother printer.
Verifying Drum Installation
Once you’ve securely fitted the toner cartridge into the new drum unit and heard the click, it’s important to verify the setup. This helps make sure your printer works correctly and avoids any printing issues.
To verify drum installation:
- First, remove the old toner cartridge from the old drum unit before putting it into the new drum assembly.
- Push the toner cartridge firmly until you hear a clear click, which means it’s locked in place.
- Check that the cartridge is fully seated by gently trying to pull it out; it shouldn’t move unless you release the lock.
- Keep the toner cartridge and new drum unit together as a matched assembly when reinstalling them into the printer.
Following these steps will help your printer run smoothly and even extend its lifespan.
Reinstalling the Drum and Toner Assembly Securely
Although it might seem straightforward, securely reinstalling the drum and toner assembly is essential to make sure your Brother printer functions properly. Start by inserting the toner cartridge into the new drum unit until you hear a clear click.
Then, slide the combined drum and toner assembly back into the printer as one piece. Make sure the assembly seats fully and evenly—don’t let it sit crooked or partially engaged.
If it’s not seated properly, your printer might not print correctly or recognize the drum unit. Once you’re confident the assembly is firmly in place, you’re ready to proceed.
Secure seating ensures smooth printer operation and accurate print quality. Don’t rush this step; take your time to avoid any installation errors. It’ll save you headaches later!
Closing the Printer Cover
After you’ve securely reinstalled the drum and toner assembly, the next step is to ensure the printer’s front cover is closed. Make sure the drum unit and toner cartridge are properly seated as one assembly before closing the cover. Don’t rush this step—closing the cover prematurely can cause alignment issues or errors.
Securely reinstall the drum and toner assembly, then close the printer’s front cover carefully to avoid errors.
When you close the cover, press firmly until you hear a click, confirming it’s latched correctly. This signals that your printer is ready to operate.
Keep these points in mind when closing the cover:
- Confirm the drum and toner unit is fully inserted
- Avoid forcing the cover if it resists closing
- Listen for the latch sound to ensure it’s secure
- Close gently but firmly for proper alignment
This final step completes the drum replacement process.
Resetting the OPC Drum Counter
How do you make sure your Brother printer accurately tracks the new drum unit’s life? After replacing the drum, you need to reset the OPC drum counter promptly. This counter monitors drum usage and helps the printer provide accurate maintenance alerts.
Before resetting, make sure the toner cartridge is properly seated in the new drum unit. Also, check that the front cover is completely closed.
The reset steps vary by model, so follow the specific procedure for your Brother printer found in its manual or support channel. If you skip or improperly perform the reset, your printer might keep showing drum warnings or fail to update its status.
Resetting the OPC drum counter ensures your printer recognizes the new drum and functions smoothly without false alerts. It’s a simple step that keeps everything running just right.
Frequently Asked Questions
Where Is the Drum on My Brother Printer?
The drum in your Brother printer is inside, behind the front cover. To get to it, you’ll need to open that cover first.
Next, pull out the toner cartridge and drum assembly together. Once you have that out, look for the green lever.
Press or release the green lever to separate the drum from the toner cartridge. Now you can replace or maintain the drum as needed. Easy, right?
How to Replace Drum on Brother Printer Mfc l5850dw?
You turn on the MFC-L5850DW and open the front cover. Then, you remove the toner and drum assembly.
Next, separate the toner from the drum. After that, replace the drum with a new one.
Once the new drum is in place, reinsert the toner back into the assembly. Then, reinstall the whole assembly into the printer.
Finally, close the front cover and reset the drum counter. This helps the printer recognize the new drum and keeps it running smoothly.
How Do I Replace the Drum on My Brother MFCL2710DW Printer?
You’ll open the front cover, remove the toner and drum unit together, and then release and separate the toner from the old drum.
Next, insert the toner into the new drum until it clicks.
After that, reinstall the unit, close the cover, and don’t forget to reset the drum counter.
It’s pretty straightforward once you get the hang of it!
How Often Should a Printer Drum Be Replaced?
You should replace your printer drum roughly every 10,000 to 20,000 pages—unless you enjoy streaky, ghostly prints haunting your documents.
Keep an eye on warnings and reset the counter after swapping it out.
Conclusion
Replacing the drum on your Brother printer is like giving your machine a fresh set of eyes—it sees clearly, prints crisply, and works smoothly. By following these easy steps, you ensure your printer stays in top shape and delivers quality every time.
Don’t forget to reset the drum counter to keep everything running perfectly. With a little care, your printer will keep producing sharp, vibrant prints just like new!
In short, replacing the drum on your Brother printer is essential for maintaining print quality and prolonging your device’s life. The drum unit plays a crucial role in transferring toner to paper, so when it wears out, printouts become faint or smudged. By regularly replacing the drum and resetting the drum counter, you keep your Brother printer running efficiently and avoid costly repairs. So, take a few minutes to swap out the drum, and enjoy crisp, clear prints every time!