How Does an FDM 3D Printer Work?
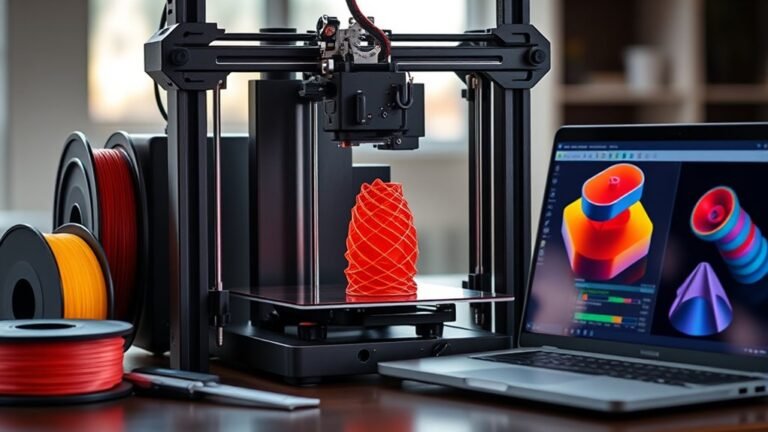
An FDM 3D printer works by melting thermoplastic filament and precisely depositing it layer by layer through a computer-controlled nozzle moving on X, Y, and Z axes. This process, known as fused deposition modeling, builds your object from the ground up with great accuracy.
As each thin layer cools and solidifies, it bonds to the previous one, gradually forming a solid structure.
Sometimes, supports are added to handle overhangs and prevent sagging during printing. You’ll also find different filament types and printer styles designed to meet a variety of needs and projects.
Keep exploring to discover how materials, supports, and post-processing techniques all influence the quality and strength of your final print. It’s pretty fascinating once you dive into the details!
Key Takeaways
- FDM 3D printers build objects by melting and extruding thermoplastic filament layer by layer through a heated nozzle. The print head moves precisely along the X, Y, and Z axes to deposit filament according to a digital model’s toolpath.
- Each layer solidifies upon cooling, bonding to the previous layer to form the object’s cross-section. After completing each layer, the build platform or nozzle raises incrementally along the Z-axis for vertical construction.
- When it comes to overhangs beyond 45°, support structures are needed to prevent sagging. These supports are removed and sanded down once the printing is done.
What Is FDM 3D Printing?
FDM 3D printing builds objects by melting thermoplastic filament and depositing it layer by layer. In this printing process, a computer-controlled print head moves precisely along X, Y, and Z axes to extrude molten material onto the build bed.
As the filament cools and solidifies, it forms each cross-section of the object according to a preset toolpath. You’ll find FDM closely related to FFF (fused filament fabrication), with both terms now describing the same technique after the original patent expired.
Keep in mind, because FDM uses thicker filament strands and larger layer heights, it generally produces less fine surface detail than resin-based methods like SLA. But understanding this printing process helps you appreciate the balance FDM strikes between accessibility, cost, and functional part creation.
How Do FDM 3D Printers Create Layers?
How exactly do 3D printers build objects layer by layer? This printing technique uses a precise process where the printer melts a thermoplastic filament and extrudes it through a nozzle.
Here’s how the layers come together:
A step-by-step look at how each layer is built and bonded in 3D printing.
- The nozzle moves in the X and Y directions, tracing each cross-section of the model.
- After completing a layer, the build platform or nozzle shifts up along the Z-axis.
- The extruded material cools and solidifies, bonding firmly to the previous layer.
- Layer thickness, or layer height, determines the resolution and visible layer lines.
Why Do FDM Prints Need Support Structures?
Because the nozzle can’t dependably deposit material over large gaps or steep angles, you’ll need support structures to prevent sagging or drooping on downward-facing parts. One of the main reasons FDM prints need these supports is that thermoplastic layers can’t “hang in air” without a base beneath them.
When you print overhangs beyond about 45°, your printer automatically generates support material to stabilize each layer. While supports increase your build’s success, they often leave marks on the underside of overhangs, so you’ll usually need to remove and sand them lightly afterward.
To make removal easier without sacrificing stability, support structures often use optimized interface layers or densities. This balance ensures your print holds up during fabrication yet remains manageable in post-processing.
What Materials Are Used in FDM 3D Printing?
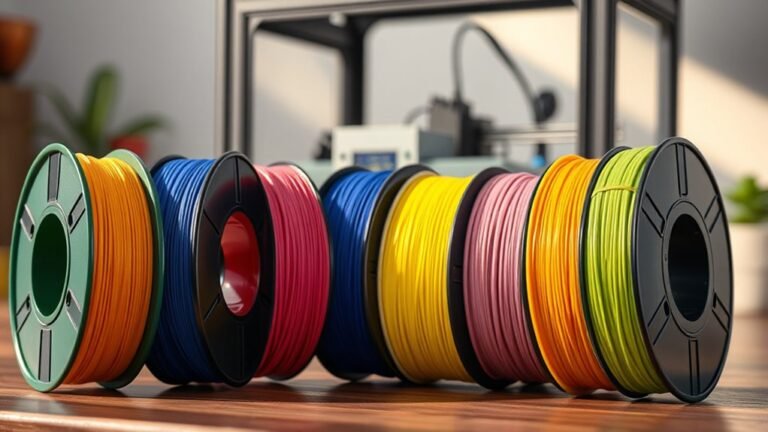
When choosing materials for 3D printing, you’ll mostly work with thermoplastic polymer filaments that feed into a heated nozzle and melt to form each layer. The main reasons these filaments are popular include their ease of use, versatility, and ability to create strong, detailed parts.
Here are the common materials you’ll encounter:
- PLA – easy to print, biodegradable, and great for prototypes.
- ABS – stronger and heat-resistant, but needs careful printing conditions.
- PETG – balances strength and flexibility, with good chemical resistance.
- TPU – flexible and durable, ideal for parts requiring elasticity.
Advanced users might select engineering filaments like nylon or carbon-fiber composites for enhanced performance. Support structures often use different, easier-to-remove materials to make the process smoother.
How Do Desktop and Industrial FDM Printers Differ?
Choosing the right material is just one part of successful FDM 3D printing—you’ll also want to take into account the type of printer that best fits your needs. Desktop FDM printers suit hobbyists and prototyping, offering flexibility for rapid iteration on smaller projects.
In contrast, industrial FDM printers focus on production runs, automating key processes to deliver consistent, high-quality results with minimal human input. Industrial setups excel in accuracy, repeatability, and throughput, enabling you to produce larger quantities faster and with reliable consistency.
While desktop printers encourage tinkering, industrial machines prioritize efficiency and scalability. So, if you need precise, repeatable parts at scale, industrial FDM is the way to go.
Desktop printers invite experimentation; industrial FDM delivers precision and scalability for consistent, high-volume production.
For smaller, less time-sensitive work, a desktop printer will likely serve you well.
Main Applications of FDM 3D Printing
Serving industries from automotive to jewelry, FDM 3D printing transforms digital designs into physical parts by precisely layering melted thermoplastic filament. As one of the main printing technologies, it’s widely used due to its cost-effectiveness and versatility.
You’ll find FDM especially useful in rapid prototyping, where quick iteration speeds up design validation. It’s also great for low-volume production, providing affordable manufacturing without the need for tooling.
Hobbyist projects and educational models benefit too, thanks to accessible desktop printers. Plus, industrial applications rely on it for repeatable, reliable parts with minimal oversight.
You can leverage FDM’s strengths for creating larger, simpler parts where surface finish isn’t critical or can be improved later. Overall, FDM remains a go-to technology for turning CAD models into functional, tangible objects across various sectors.
How Does FDM Compare to Other 3D Printing Technologies?
When comparing FDM to other 3D printing methods like SLA, you’ll notice FDM excels at producing strong, large parts but struggles with fine details and smooth finishes.
You might also hear FDM called FFF, as they share almost the same process after the original patent expired. Understanding these strengths and limitations helps you choose the right technology for your project.
FDM Versus SLA
How does FDM stack up against SLA in 3D printing? When you compare FDM versus SLA, you’ll find each has distinct strengths. Here’s what you should know:
FDM melts thermoplastic filament and deposits it layer by layer, while SLA uses a laser to cure liquid resin.
SLA delivers finer details and smoother surfaces, making it ideal for complex, highly detailed parts.
FDM suits larger, simpler parts and typically produces stronger, more durable plastic objects.
After 2009, FDM and FFF became synonymous, but they remain fundamentally different from SLA’s resin-curing approach.
FDM Versus FFF
In comparing FDM and FFF, you’ll find they share the same basic process of melting and extruding thermoplastic filament layer by layer.
The main difference lies in their origins and typical use cases: FDM was developed by Stratasys for higher-detail, industrial-style functional prototypes with controlled print environments, offering better repeatability.
FFF, on the other hand, became popular as a budget-friendly alternative, often without a controlled chamber, making it ideal for hobbyists and desktop printers.
Since the 2009 patent expiration, both terms describe similar technologies widely available at various price points.
While both excel at producing functional prototypes, FDM machines tend to deliver more consistent quality.
Understanding this helps you choose the right approach based on your needs and budget.
Strengths And Limitations
Choosing between FDM and other 3D printing technologies means weighing their unique strengths and limitations. When the print head is moved, FDM deposits melted thermoplastic layer-by-layer, offering distinct advantages and trade-offs compared to methods like SLA.
Here’s how they compare:
- FDM produces stronger, more durable parts, ideal for functional prototypes and larger models.
- SLA offers finer features and smoother surfaces without much post-processing, thanks to its precise laser curing.
- FDM struggles with very small details and often shows visible layer lines, requiring sanding to improve finish.
- FDM works best for simpler geometries and rapid production, while SLA excels at complex, highly detailed designs.
Understanding these points helps you choose the right technology for your project’s needs. It’s all about matching the method to what you want to achieve.
How to Post-Process FDM 3D Prints
To get a smooth finish on your FDM prints, start by removing any supports carefully—whether snapping, cutting, or dissolving them. Then, focus on sanding the surface to blend layer lines and smooth rough spots.
These steps set the stage for further finishing like priming or painting if you want a polished look. It’s all about taking it step-by-step to get that nice, clean result.
Surface Smoothing Techniques
Although FDM 3D prints often come out with visible layer lines and stringing, you can significantly improve their appearance by carefully smoothing the surface. Start by trimming stringing and sanding progressively from 120 to 400 grit to reduce roughness.
Next, consider chemical vapor smoothing—acetone works well for ABS, but PLA requires different approaches and won’t smooth as reliably. Then, fill gaps with body filler or epoxy putty and sand again for a uniform finish.
Finally, prime with a high-build primer and sand with 400–800 grit to erase remaining texture. For the smoothest results without heavy sanding, try printing techniques that use thinner layers or higher resolution settings.
Follow these steps to enhance your print’s look without adding extra material. It’s a simple way to get a much cleaner finish!
Support Removal Methods
Your print’s supports play a key role during fabrication but need careful removal afterward to preserve your model’s quality. For many overhangs, you can simply snap off supports manually if they’re made to break away cleanly.
Using soluble supports like PVA makes removal even easier—just soak your print in water, rinse thoroughly, and dry to avoid residue.
If supports are tougher, use flush cutters, a hobby knife, or a deburring tool to gently remove them without damaging your model’s surface. Afterward, sand support contact points starting with 120–240 grit to level bumps, then finish with 400–600 grit for smoothness.
Finally, clean the print with isopropyl alcohol to remove fine particles and oils. This step ensures a cleaner, more polished look after post-processing.
Frequently Asked Questions
What Is the FDM Process?
The FDM process melts plastic filament, then extrudes it layer by layer through a nozzle, building your object from the bottom up. It cools and solidifies each layer, sometimes adding supports for overhangs or complex shapes.
Basically, it’s like squeezing out toothpaste but with melted plastic. And as each layer cools, it sticks to the one below, slowly creating your 3D object.
How Does a 3D Printer Work?
Imagine painting with plastic instead of paint—you’ll guide the printer to melt and lay down layers precisely.
It builds your object from the ground up. The printer moves in three dimensions, transforming digital dreams into real things.
Can I 3D Print at Home?
Yes, you can 3D print at home using an FDM printer. Just be ready to manage support removal and deal with visible layer lines.
Also, consider some post-processing if you want smoother finishes on your prints. It’s all part of the fun!
Are FDM and PLA the Same?
FDM and PLA aren’t the same, like a painter and their paint. You use FDM as the method, while PLA’s just one type of filament you can print with.
They work together but aren’t identical. Think of FDM as the process, and PLA as the material you choose for that process. Simple as that!
Conclusion
Think of FDM 3D printing as building a sculpture one thin layer at a time, like stacking delicate sheets of paper to create art. You’ll appreciate how it combines precision and versatility, letting you turn digital ideas into physical objects right before your eyes.
Whether for prototypes or finished products, understanding FDM empowers you to release creative potential and bring your designs to life with just a few simple steps. This technology works by melting filament and depositing it layer by layer, making it accessible and efficient.
In short, FDM 3D printing is a powerful tool that transforms your digital designs into tangible objects. By mastering this process, you can create everything from intricate prototypes to durable end-use parts with ease. Embracing FDM opens up endless possibilities in creativity and manufacturing.