How to Scan and Email a Document With HP Printer in 5 Easy Steps
To scan and email a document with your HP printer, start by powering it on and placing your document face down, aligned properly on the scanner glass. This step is important for clear, accurate scans every time.
Next, open the HP Smart app or use the printer menu to select the correct scan settings. Choose options like paper size, quality, and color based on your document’s needs.
Once you’re ready, scan your pages. If you have multiple pages, add more scans before saving.
After scanning, save your file as a PDF to keep everything organized in one document.
Finally, use the app’s share feature to email your multi-page PDF directly. It’s a simple way to send documents quickly without needing a computer.
Keep reading for some handy tips to get perfect scans with your HP printer every single time!
Key Takeaways
- Power on the HP printer, place the document face down on the clean scanner glass, and align it properly.
- Open the HP Smart app, select Print & Scan, choose Scan, and set document size, quality, and color settings.
- Increase scan resolution for clear text and detailed images, ensuring scan size matches the document for automatic cropping.
- Scan the first page, then use Add new scanned pages to include more pages, rotating or cropping if necessary.
- Save the scanned document as a multi-page PDF, then use Share/Save to email it by entering recipient details and sending.
Get Your HP Printer and Document Ready to Scan
Before you start scanning, make sure your HP printer is powered on and the scanner lid is spotless and closed. Every day, you should double-check these basics to avoid any scanning hiccups.
Make sure your document is placed face down on the scanner glass, aligned with the corner or edge indicated. If you’re scanning multiple pages, keep them together and be ready to scan each page in sequence.
Pick the Right Scan Settings in HP Smart or on Your Printer
- Set Paper Size, Quality, and Color from the top drop-down menus. Choose Document scanning over Photo for clear emails. Then, pick Color or Black & White based on your content.
- Increase the Quality/Resolution for sharper text. This is especially helpful if your document has small print or detailed diagrams.
- Use the Scan Size setting to match your document. HP Smart will crop out any extra blank space automatically.
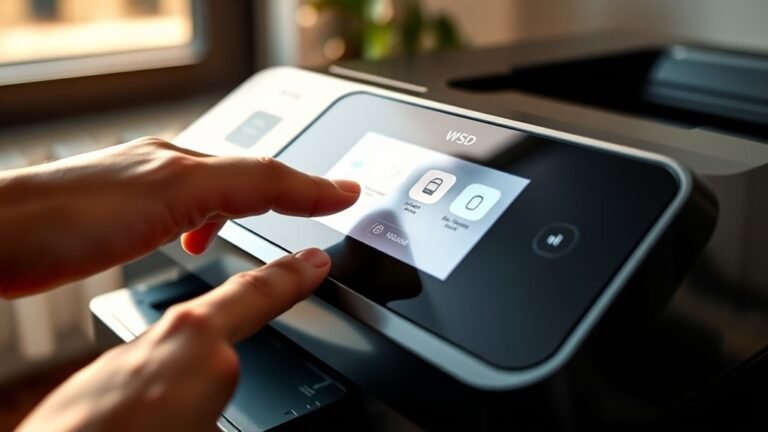
If your printer has a display, try to mirror these settings on the on-screen menu for the best results. It helps keep everything consistent and looking great!
Scan Your Document and Add More Pages If Needed
Start by opening the HP Smart app on your computer, selecting Print & Scan, then choosing Scan. Place the first page face down on the glass and close the lid.
Begin by launching the HP Smart app, selecting Print & Scan, then Scan, and placing your page face down.
In the scan dialog, adjust the paper size, quality, and color settings as needed. Then click Scan to capture the page.
If your document has additional pages, remove the scanned page and place the next one face down on the glass. Close the lid and click Add new scanned pages to include it in the same scan.
Repeat this step for each page. You can use the rotate or cropping options if a page is misaligned or has extra blank space.
Once you’ve scanned all pages, click Save to store your combined document before moving on to emailing it.
Save Your Scanned File as a PDF for Emailing
After scanning all your pages and making any needed adjustments, the next step is to save your document as a PDF for easy emailing. Here’s how to do it efficiently:
First, in the scan settings, select Document mode and set the output file type to PDF before you hit Scan. This makes sure your file is ready for sharing.
If you want all your scanned pages combined into one multi-page PDF, use the Add pages option. This keeps your document nice and organized.
Once you’re done scanning, use the Save/Share feature to save the PDF to your device. And if you need to, crop or rotate pages using HP Smart’s tools before saving to get rid of any unwanted margins.
This way, you’ll have a clean, easy-to-send PDF file ready to go.
Attach and Send Your Scanned PDF via Email
When you’ve finished scanning and saving your document as a PDF in HP Smart, tap Share/Save and select Email to attach your file directly. If the scan needs adjustments, use the crop/rotate tools before choosing Print or Share to proceed.
On the email screen, check that the attachment filename appears as a PDF. Then, enter the recipient’s email address along with any subject or message.
Make sure your PDF attachment is visible, then add the recipient’s email and any message before sending.
Before sending, review your scan settings like Paper Size, Quality, and Color/B&W from the drop-down menus at the top. Finally, tap Send to email your scanned PDF.
If the attachment doesn’t show, just reopen the saved scan and select Share again to attach it properly. Easy, right?
Frequently Asked Questions
How Do I Get My HP Printer to Scan to Email?
You get your HP printer to scan to email by using the HP Smart app. First, open the app and select your printer’s scan option.
Next, choose “Document to E-mail.” Make sure your printer’s email settings are correctly set up in the app.
If everything’s configured right, you’ll be able to scan and send documents straight from your printer to your email. Easy, right?
My HP Deskjet Printer’s Scanner Isn’t Working. What Can I Do to Fix This?
Restart your printer and device, check your Wi-Fi or USB connections, and clean the scanner glass. Also, make sure the document is properly placed.
Next, update the firmware and reinstall HP Smart. If the issues still persist, try running HP Smart troubleshooting.
How Do I Add an Email to a Printer?
Don’t beat around the bush—open your HP Smart app, go to printer settings, and add the email under the e-mail setup or SMTP configuration.
This gets your printer ready to send scans directly by email. Easy, right? Just a few taps and you’re set!
How Do I Scan and Send a Document From My Printer?
You place your document on the scanner glass, open the HP Smart app, and select Scan. Then, adjust the settings to your liking before you start scanning.
Once your document is scanned, you simply tap Share or Email. This way, you can send the document directly from your device without any hassle.
Conclusion
Now that you know how to scan and email documents with your HP printer in just five easy steps, you can save time and stay organized. Worried it might be complicated? Don’t be—it’s simpler than it sounds once you get the hang of it.
With a little practice, scanning directly to email becomes a quick, hassle-free part of your routine. Give it a try, and you’ll wonder how you ever managed without it!
Mastering how to scan and email a document with your HP printer not only boosts your efficiency but also keeps your digital files neatly organized. Once you’ve got the steps down, sending scanned documents via email is smooth and stress-free. So don’t hesitate—start scanning and emailing today and enjoy a more streamlined workflow with your HP printer!