How Do You Copy on a Printer in 10 Easy Steps?
To copy on a printer in 10 simple steps, start by switching it on and loading the right paper type and size. Make sure you have the correct paper loaded so your copies come out perfect.
Next, place your original document properly—face up in the feeder or face down on the glass. This helps the printer know exactly what to copy.
Then, open the copy menu, set the number of copies you want, and select the matching paper size.
Choose whether you want color or black-and-white mode. After that, adjust the copy quality settings if you need to tweak the sharpness or brightness.
When everything looks good, press start to begin copying.
Keep an eye on the output to make sure your copies turn out right. If needed, you can always fine-tune the settings for the best results next time.
Easy, right? Just follow these steps, and you’ll be copying like a pro in no time!
Key Takeaways
- Turn on the printer, load the correct paper type and size, and wait for the ready light to appear.
- Place the original document face up in the document feeder or face down on the scanner glass.
- Access the copy menu on the control panel, then set the number of copies, paper size, and orientation.
- Choose color or black-and-white mode and select copy quality (Draft, Standard, or High) based on your needs.
- Press the Start or Copy button to begin copying, then monitor and count output copies to confirm accuracy.
Turn On Your Printer and Load Paper
Before you start copying, make sure you turn on your printer using the power button and wait until the ready light comes on. This shows the printer is fully powered and ready to go.
Next, load the correct paper type and size into the tray. Make sure it matches the document size you plan to copy, like A4 for standard sheets.
Align the paper properly with the guides to prevent jams or misfeeds. Adjust your printer or computer settings to match the paper size and orientation, whether portrait or landscape.
Don’t overfill the tray; fan the paper stack and keep it below the maximum fill line. Finally, if your printer has an output tray, position it correctly so printed pages come out smoothly without jamming.
Place the Original Document for Copying
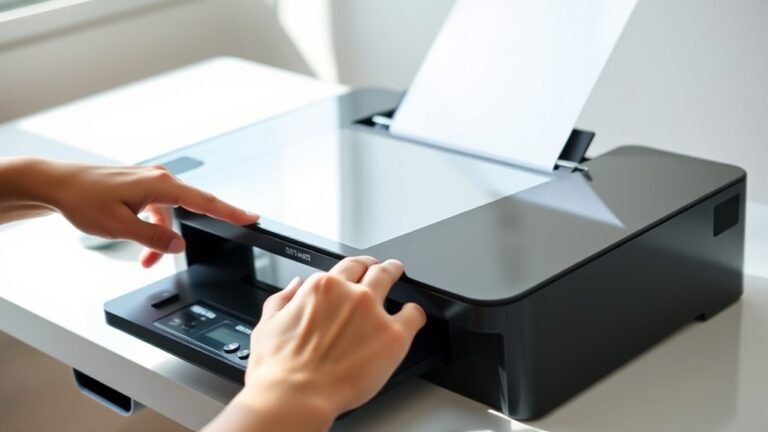
Once your printer is powered on and loaded with the right paper, it’s time to place the original document correctly for copying. If your printer has a document feeder, place the document face up, aligning it with the guides.
Otherwise, position it face down on the scanner glass, making sure it’s centered within the marked area. For thick or bound documents, the flatbed glass is best.
Always remove staples, clips, or torn edges to prevent jams. After placing the document, close the scanner lid gently to avoid shadows or blurred edges on your copy.
Also, double-check that the paper size in your printer matches the size you want for your copy, like A4 or Letter, to get the best results.
Open Your Printer’s Copy Menu
Turn on your printer and find the Copy button on the control panel or touchscreen. Once you open the Copy menu, you’ll see options to adjust settings like the number of copies and paper size.
Take your time to navigate through these choices and set everything just right before you start copying. It’s pretty straightforward once you get the hang of it!
Access Copy Function Easily
To access the copy function, start by powering on your printer and loading paper into the tray. Then, open your printer’s control panel or app to find the Copy option.
If your printer has mode buttons, simply press Copy or select it on the screen to enter copy mode. Once inside the copy menu, adjust settings like Copies, Paper Size, and Orientation to match your loaded paper and document.
For clearer copies, tweak the print quality between high and draft before you start. Place your original document on the scanner glass or in the document feeder.
When your settings look good in the copy menu, press Start or Print to begin copying. This straightforward access ensures you’re ready to copy quickly and efficiently.
Navigate Printer Control Panel
After accessing the copy function on your printer’s control panel, you’ll want to navigate the copy menu to set up your print job properly. Start by finding the copy button or icon to open the copy menu.
Once there, locate the Copies setting and use the + or – buttons, or the keypad, to select how many copies you need. Next, choose the correct paper size and paper type to match the paper you’ve loaded, like A4 or Letter.
If your printer offers it, adjust the orientation between portrait and landscape, and pick the color mode—either color or black-and-white. Double-check all your selections on the display, then press Start, Copy, or OK to proceed with your copy job.
Select Copy Menu Options
From your printer’s control panel or on-screen menu, select the Copy option to open the Copy settings. Next, set the number of Copies you want, like 10, and confirm it before moving on.
Choose the right paper size—A4 or Letter—and pick the orientation that matches your original document, portrait or landscape. Adjust the print quality to fit your needs: use Draft for speed or High/Best for clearer results.
If your printer offers it, select between color and black-and-white copies. Don’t forget to set the zoom or scale option, such as 100% or Fit to Page, so your copies print exactly how you want.
Once all settings are correct, just press Start or Copy to begin. It’s pretty straightforward from there!
Set the Number of Copies You Need
You’ll find the “Copies” field in your printer’s print dialog, where you can enter the exact number of copies you want. Simply type the number, like 10, directly into the box.
If your printer uses a stepper with plus and minus buttons, use those controls to adjust the count instead.
For batch or group printing, make sure to set the copies per document correctly to get the right total output for each item.
Once you hit print, keep an eye on the printer as it starts working. Quickly check the first few sheets to confirm that it’s producing the exact number of copies you requested.
This helps avoid wasting paper and ensures your job is done right.
Choose the Right Paper Size for Your Copy
Before you start copying, make sure the paper size in your document matches the paper loaded in the printer. Using the wrong size can cause cropping or unwanted margins.
Double-check both the paper type and printer settings to avoid any printing issues. It’s a quick step that can save you a lot of hassle later on.
Verify Document Paper Size
A vital step in copying is verifying that the paper loaded in your printer matches your document’s specified size. If your document is set to A4, make sure to load A4 paper—not Letter—to avoid cropping or unwanted scaling.
Always check the paper size and orientation in your printer or copy settings so it lines up with your document’s layout.
To verify your document paper size effectively:
- Confirm the paper size in the print or copy preview, especially for large print jobs.
- Match the orientation (portrait or landscape) to your document’s layout.
- Perform a quick test copy to ensure the output fits perfectly before running multiple copies.
This simple check can save you paper and makes sure your copies look just right.
Match Printer Paper Loaded
After confirming your document’s paper size and orientation, the next step is ensuring the printer has the correct paper loaded. Check that the paper in the tray matches your document size—using A4 paper for A4 documents or Letter size for Letter documents. This prevents cropping or scaling issues.
Set the printer’s paper tray settings to match the loaded paper size for accurate feeding and margins. Before a big copy job, verify these settings on the printer display. Doing a quick test copy after changing paper size helps confirm everything aligns properly.
| Document Paper Size | Printer Paper Loaded |
|---|---|
| A4 (210 × 297 mm) | A4 |
| Letter (8.5 × 11 in) | Letter |
| Legal (8.5 × 14 in) | Legal |
| Executive | Executive |
| Statement | Statement |
Avoid Incorrect Paper Types
When you want your copies to look professional and accurate, choosing the right paper size and type is critical. Using the wrong paper can cause cropping, scaling issues, or poor print quality.
To avoid this, follow these steps:
- Match the document’s paper size with the paper loaded—use A4 for A4 documents, not US Letter, to prevent stretching.
- Ensure the paper orientation fits the layout—portrait for vertical and landscape for wide documents—to keep text centered.
- Select the correct paper type in the printer menu, like plain, photo, or thick paper, to reduce smudging and feeding errors.
Always do a quick test copy first to check margins and scale before printing a large batch. This way, you make sure your copies come out just right.
Select the Correct Orientation for Your Document
Since the layout of your document affects how it prints, you’ll want to select the correct orientation before copying. Choose portrait (vertical) for pages taller than they are wide, like standard letters or A4 text documents.
Use landscape (horizontal) for wide layouts, such as tables, spreadsheets, or landscape images, so nothing gets cut off on the sides. Make sure to check the page size—A4 or Letter—and match it in your printer’s settings.
If your document includes photos or dense graphics, pick high-quality orientation-aware settings to keep everything aligned properly. Once you’ve selected the right orientation, do a quick test print of one or two pages to verify margins and alignment.
This helps avoid wasting paper and ensures your final copy looks perfect.
Choose Color or Black-and-White Copy Mode
- Use Black & White when color isn’t needed. It converts the original to grayscale, saving ink.
- Choose Color to keep photo clarity and vibrant images looking sharp.
- After picking your mode, set any paper type or quality presets. This helps keep text and images nice and crisp.
Finally, enter the number of copies you want. Then press Start/Copy and make sure your output matches the mode you selected before you finish.
Adjust Copy Quality Settings for Your Needs
Although you’ve already selected color or black-and-white mode, adjusting the copy quality settings lets you optimise your prints for the best results. Open your printer’s Copy screen and choose from options like Draft, Standard, or High/Best.
Draft mode saves ink and speeds up copying, while High/Best sharpens edges and improves small font readability. If available, increase resolution (dpi) for detailed images or photos.
After setting your preferences, run a test copy to ensure clarity and color density meet your needs. It’s a quick way to make sure everything looks just right before you start a big batch.
Start the Copy Job
Now, open the print dialog from your application or printer menu to kick off the copy job. Enter the number of copies you need and double-check your settings before moving forward.
Once everything looks right, go ahead and confirm the print job to start copying. Easy, right? Just make sure you’re happy with the settings before you hit that button!
Locate Print Dialog
- Confirm the correct printer is selected at the top of the dialog. This makes sure your copies go to the right device.
- Check the paper size and orientation settings to match your document’s layout. Think about options like A4 or Letter, and whether you want portrait or landscape.
- Click Print to start the job once everything looks good.
This way, you’re all set before deciding how many copies you want.
Set Number Copies
| Step | Action | Tip |
|---|---|---|
| Open Dialog | Access print dialog | Usually from the File menu |
| Locate Copies | Find Copies box | Near print settings |
| Enter Number | Type your copy count | Use numeric keys |
| Start Job | Press Start/OK | Begins copying immediately |
| Monitor Output | Watch progress | Confirm total copies printed |
Confirm Print Job
To successfully confirm your print job:
First, make sure the selected printer is the one you actually want to use. Double-check that the specified copy quantity matches what you entered.
If your printer has batch or grouped printing options, confirm those settings are right for your needs.
After the job finishes, take a moment to physically count the printed copies. This final check helps ensure everything matches the number you confirmed.
That way, your copy task gets done exactly how you expected.
Review Copies and Repeat if Necessary
Always confirm the number of copies you’ve set in the printer’s dialog before hitting print. Open the print dialog and verify the Copies field shows the exact number you want—say, 10.
After printing, check the output matches this count. If the number is off, cancel the job if possible, correct the Copies value, and print again.
For large jobs, start with a test print of 1–2 copies to ensure alignment and quality before running the full batch. Take advantage of any repeat or batch printing options your printer offers to streamline the process and avoid errors.
This careful inspection saves time and materials, ensuring you get exactly the copies you need without extra hassle.
Frequently Asked Questions
How to Copy on HP Printer?
You just place your original on the scanner or feeder, then press Copy on the control panel.
Next, set your paper size and copy preferences. Enter how many copies you want, then hit Start Copy to get your prints quickly. Easy, right?
How to Print a Document in Windows 10?
You open your document, press Ctrl+P or select Print from the menu. Then, choose your printer and adjust settings like copies and paper size.
After that, just click Print. It’s a good idea to double-check your settings first to avoid mistakes before printing everything.
How to Take a Print Copy?
Taking a print copy is like capturing a moment in time. Just select your document and choose the number of copies you want.
Next, pick the right printer and settings. Then hit print.
You’ll hold that moment on paper instantly. Easy, right?
How Do I Photocopy on My Epson Printer?
You just place your original face-down on the scanner glass, press the Copy button, choose your settings like number of copies and color, then hit Start.
For multiple pages, use the automatic document feeder if available. It’s pretty straightforward!
Conclusion
Now that you’ve got your copies done, isn’t it funny how the printer always seems to work perfectly the first time you don’t need it? But since you followed these simple steps, you’re ready for any copy emergency—whether it’s a last-minute report or a stack of recipes.
Just remember, next time your printer jams or runs out of ink, it’s probably waiting for you to master these steps all over again! Knowing how to copy on a printer confidently can save you time and frustration.
With these easy steps in your toolkit, you’ll be able to handle any copying task with ease. So go ahead, make those copies like a pro, and never let a printer problem slow you down again!